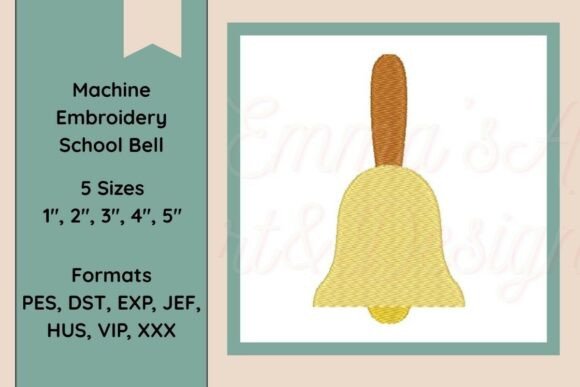
Machine Embroidery School Bell
A Clean, Confident Bell—Not Just for September
When I opened the Machine Embroidery School Bell file for the first time, I didn’t see “cute” or “trendy”—I saw intentional. The outline is crisp but not rigid; the bell’s curve feels balanced, its clapper centered just enough to suggest motion without clutter. There’s no excessive scrollwork, no forced whimsy—just a quiet, confident school bell that reads clearly at 2.5 inches and still holds up at 1.75 inches on a child’s onesie. It’s the kind of machine embroidery design that works because it doesn’t try too hard. That matters—especially when you’re stitching for real people, not just mockups.
Real Project Test: A Teacher-Appreciation Tote Bag
Last week, I used the Machine Embroidery School Bell on a natural canvas tote for a local teacher appreciation day—custom embroidered with her name in a simple sans-serif script beneath the bell. We stitched it on mid-weight cotton canvas with medium tear-away stabilizer and standard 40-weight polyester thread. The result? Crisp satin stitch edges on the bell rim, smooth fill stitch inside the body, and zero puckering—even across the slight curve of the tote’s gusset. Customers paused at the booth not because it was flashy, but because it looked *thoughtful*. That’s the quiet strength of this design: it supports the message instead of competing with it.
Where It Shines (and Where It Asks for Care)
The Machine Embroidery School Bell excels in projects where clarity and warmth matter more than complexity:
- Custom apparel: Works beautifully on crewneck sweatshirts (left chest), lightweight tees (upper back), and aprons (pocket corner).
- Personalized gifts: Stitches cleanly on baby blankets, nursery pillow covers, and linen tea towels—ideal for Back To School baby showers or first-day-of-kindergarten keepsakes.
- Small shop product: Looks polished on embroidered patches (heat-seal or sew-on), especially when paired with minimalist text like “Ask Me About My Teacher” or “Classroom Crew.”
- Digital embroidery file use: Holds up well in printable mockups—its clean lines translate reliably to both light and dark fabric previews.
That said, it’s not universally forgiving. On highly textured fabrics like heavy terry cloth or bouclé knit, the fine detail of the clapper can blur unless you adjust stitch density or add cutaway stabilizer. And on stretchy fabric—say, a ribbed knit cap—the bell’s symmetry can warp slightly if hooping isn’t precise. It’s also not built for ultra-small hoop sizes (under 3" x 3") without simplification; the inner clapper detail starts to compress and lose definition.
What It Adds to Your Finished Product
This isn’t just decoration—it’s subtle brand language. When I added the Machine Embroidery School Bell to a set of handmade kitchen towels sold in a boutique, customers consistently commented on how “calm” and “professional” the stitching felt—no small thing when your handmade product competes with mass-produced alternatives. It signals care, consistency, and intentionality. For Etsy sellers, that translates directly to perceived value and repeat engagement. Teachers recognize it instantly—not as a cliché, but as a quiet nod to their craft. And because it avoids cartoonish exaggeration, it stays relevant beyond August: think end-of-year thank-yous, retirement gifts, or even alumni merchandise.
Practical Designer Notes Before You Stitch
Before using the Machine Embroidery School Bell in your next project, here’s what I recommend:
- Test on scrap fabric first—especially if you’re using textured, dark, or lightweight material. Note how the fill stitch settles and whether the clapper remains legible.
- Check thread color contrast: This design relies on shape, not shading. A low-contrast combo (e.g., light gray on heather grey) can mute its impact. Stick to clear tonal separation for best recognition.
- Review stitch density: If your machine defaults to high-density fills, consider reducing by 5–10% for softer drape on apparel. Overly dense stitching can stiffen lightweight fabrics unnecessarily.
- Confirm hoop size compatibility: While the design scales well, verify your intended size fits comfortably within your hoop’s active stitching area—especially for curved surfaces like caps or sleeves.
- Inspect small details in your embroidery software: zoom in on the clapper and rim junction. Make sure no stray running stitches or underlay gaps compromise sharpness.
- Test black-and-white mockups before finalizing listings—this design’s strength is its readability, and monochrome previews reveal whether it holds up visually without color crutches.
- Use proper stabilizer: Medium tear-away for stable wovens; cutaway for knits or delicate linens. Skip lightweight fusible-only stabilizers—they won’t support the satin rim consistently.
- Verify licensing before selling finished items or bundling the digital embroidery file into kits. Since the listing notes it’s “ideal for classroom teacher projects,” confirm whether commercial use is explicitly permitted for your craft business model.
Final Thought: A Design That Respects the Craft
The Machine Embroidery School Bell doesn’t shout. It doesn’t need to. In a landscape full of overdesigned, overdigitized motifs, it stands out by honoring restraint—clean lines, purposeful spacing, and thoughtful scale. Whether you’re an Etsy seller building a cohesive Back To School collection, a small shop owner embroidering boutique aprons, or a designer sourcing reliable design assets for client work, this is the kind of embroidery file that earns trust—not because it’s flashy, but because it stitches true, looks intentional, and lets your craftsmanship take center stage.