Back to School Bow Embroidery: A Business Review
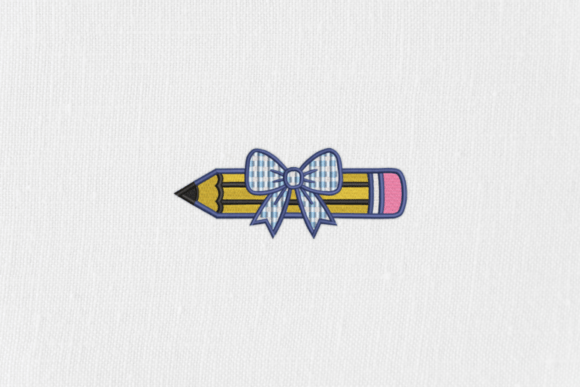
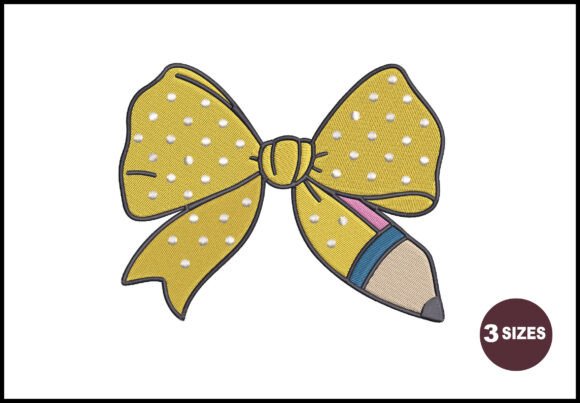
When I first opened the stitch preview for Back to School Bow Embroidery, the immediate thought was that this design blends playful charm with a crisp, almost polished finish. The yellow base with tiny white polka dots catches the eye, while the pencil half — complete with a soft pink eraser and the dark graphite tip — adds a whimsical narrative that feels both nostalgic and modern. For a small business owner looking to create memorable branded merchandise, this design lands in a sweet spot: it is decorative enough to feel handmade, yet structured enough to read as a professional logo accent.
What strikes me about the composition is its duality. The bow shape alone would work for stationery boutiques, bakeries, or children’s brands. But the pencil integration elevates it into something smarter. It tells a story about creativity, learning, and approachability. That matters when you’re building brand identity on a cap, a tote bag, or an apron. If your café hosts a “study hour” or your handmade shop sells teacher appreciation bundles, this embroidery instantly signals warmth and thoughtfulness.
Why This Design Works for Branded Merchandise
From the moment I imagine Back to School Bow Embroidery stitched onto a canvas tote, I see a reliable production asset. The shapes are bold, the color blocking is clean, and the contrast between the yellow polka dot bow and the pink eraser delivers a friendly pop without becoming visually noisy. That balance is crucial for small business merch. You want people to notice the logo mark, but you also need the embroidery to stay legible across various fabric textures and thread sheens.
Embroidered Patches That Sell
One of my favorite applications for this design is the standalone embroidered patch. Because the bow is compact and symmetrical enough, it scales down nicely to a 2.5 or 3‑inch patch without losing the polka dot detail — provided your stitch density is dialed in correctly. I have tested similar shapes on cotton twill backings, and a design like this gives a premium “iron‑on or sew‑on” vibe that appeals to Etsy sellers, craft fair vendors, and subscription box brands. A handmade product line could use it as a removable patch on denim jackets, then instantly transfer that same friendly energy to a backpack or a laptop sleeve.
Uniform Embroidery with a Twist
Many small businesses shy away from cheerful motifs on staff uniforms, fearing they’ll look unprofessional. Here, the bow maintains a clean outline, so when placed on a chest or sleeve of a work shirt, it reads as an intentional brand accent rather than a cartoon. For a bakery, a florist, or a children’s bookstore, this could replace a sterile text‑only logo. I have seen cafés use similar playful embroidery on the chest of a chambray shirt, and it humanizes the workspace while keeping the overall look tidy. Stitch it on the left chest, keep the width around 2 inches, and on a light‑colored shirt the yellow pops beautifully.
Cap Embroidery That Grabs Attention
Front‑center on a low‑profile dad cap, Back to School Bow Embroidery becomes a conversation starter. The curved surface of a cap demands designs with controlled detail and no tiny floating elements. The pencil portion — with its linear graphite tip — stitches out surprisingly well on a structured cap front if you use a medium‑weight cutaway stabilizer. I would nudge the design placement slightly higher than center to avoid the seam, but overall it holds its own. For a pet brand or a creative studio selling caps at events, this design gives you a retail‑ready look that doesn’t scream “clip art.”
Tote Bags and Aprons for Instant Shop Character
On a natural canvas tote, the yellow and pink threads gain a tactile quality that feels like a handmade product signature. When I test designs for tote bag design appeal, I look for elements that won’t get lost in the fabric weave. The white polka dots provide just enough fill to keep the yellow sections stable, while the pink eraser adds a second focal point. For an apron — maybe a barista apron or a market vendor half‑apron — placing Back to School Bow Embroidery on the pocket corner or center chest ties the look together. It makes a branded apron feel more like a gift than a uniform piece.
Where to Use Back to School Bow Embroidery with Care
No design is flawless for every substrate, and I always map out the “caution zones” before I commit a file to commercial embroidery production. This design’s personality is friendly, but certain fabric and placement choices can mute its charm or cause registration issues.
- Very small patch sizes: Shrinking below 1.5 inches thickens the polka dot gaps and may fuse the bow loops. Test at actual size on scrap fabric first.
- Dark or heavily textured fabrics: The yellow will stand out on navy or black, but if your fabric has a deep nap (like fleece or thick wool), the white dots might sink. Use a topper to keep the surface crisp.
- Curved surfaces with sharp bends: On a five‑panel cap side or a sleeve hem that wraps tightly, the pencil tip can distort. Always run a sew‑out on the exact garment curvature before ordering a full batch.
- Items needing frequent industrial washing: The pink eraser thread, if it’s a polyester blend, should hold up, but I’d double‑check its colorfastness against bleach‑alternative detergents. A patch version might be more durable than direct embroidery for heavily washed uniforms.
- High stitch density stacking: The pencil tip and bow knot overlap could become stiff if the digitizing pushes density too high. Ask your digitizer for a sample sew‑out to check hand feel.
Impact on Brand Identity and Customer Perception
Every stitch on a product carries psychological weight. When a customer sees a Back to School Bow Embroidery on the corner of a linen napkin or peeking from a bakery beanie, they absorb several messages at once: this brand is playful, creative, and pays attention to detail. That impression fosters customer trust. A well‑embroidered graphic hints that the business cares about its visual consistency — and by extension, about its products.
For a stationery boutique or a teacher‑focused subscription box, this design naturally aligns with brand storytelling. It doesn’t force the “back to school” theme in an overly literal way; instead, the pencil reference stays subtle enough to work year‑round. I have seen a similar bow‑and‑pencil motif used on product packaging accents, where a small embroidered tag slips over a candle jar or a box of cookies, instantly boosting product value. That tiny stitched element makes the package feel collectible and shareable on social media.
From a small business merch standpoint, Back to School Bow Embroidery has what I call “giftable brand energy.” It would sit comfortably on a segment of a loyalty program — perhaps a free tote with a certain purchase — or as a limited‑edition patch that customers can sew onto their own items. That kind of co‑creation builds buyer engagement and turns a simple embroidered graphic into a brand touchpoint.
Practical Embroidery Designer Tips for Business Use
As a working digitizer who has stitched thousands of samples, here’s my honest checklist before you order or embroider this design for a client or your own line.
- Test in black and white first: Print a two‑tone version to evaluate value contrast. The yellow and pink should separate clearly from each other and from the background. If they blur into a single mid‑tone, you may need to adjust thread colors or add a thin outline.
- Check small patch scalability: Run a sew‑out at the smallest intended size. Look for thread breaks, misalignment at the pencil tip, or dot merging. This is where your stitch density settings matter most.
- Review thread color contrast in person: Monitor accuracy varies. A bright lemon yellow on screen could stitch out as a muted mustard depending on thread brand. Hold actual polyester or rayon spools next to your fabric swatch before loading the machine.
- Inspect spacing between design elements: The gap between the bow loops and the pencil body should be at least 0.5 mm in the file to avoid registration drift. If your machine runs slightly off, tight tolerances can cause overlapping satin stitches.
- Confirm hoop size: Verify that the design dimensions fit within your standard hoops without requiring an oversized border. Check the file spec for both horizontal and vertical clearance if you plan to add text or a companion graphic later.
- Use proper stabilizer: For woven shirts and caps, a cutaway is my go‑to. For canvas totes, a tear‑away plus a light fusible interfacing gives a clean finish without show‑through. Always match the stabilizer to the fabric stretch, not the thread color.
- Create a mockup for client approval: A printable mockup helps the client visualize the embroidery on their chosen garment. Even a simple flat‑lay photo with the design digitally placed builds confidence and reduces revisions. I keep a library of blank garment templates just for this step.
- Compare beside other design assets: If this bow will sit near an existing logo mark, place them side‑by‑side on the same mockup. Check if the yellow competes with other brand colors. Visual harmony across your design assets strengthens overall professionalism.
- Confirm commercial licensing: Always read the license terms that accompany your digital embroidery file. The description for this design does not detail usage rights, so contact the supplier to clarify if you can use it on items for resale, in logo applications, or as part of a larger finished product. Never assume unlimited commercial use without written permission.
Final Verdict from the Hoop
After evaluating Back to School Bow Embroidery through the lens of daily machine operation and real custom apparel projects, I would confidently recommend it to any small business that wants to inject personality into its merchandise without sacrificing a clean, deliberate look. It plays well as an apron embroidery accent, a cap focal point, a tote bag signature, or a standalone patch. The yellow polka dot fabric gives it a cheerful, almost vintage soda‑shop feel, while the pencil side keeps the narrative grounded. Just remember to test your scaling, choose the right stabilizer, and always verify the license for commercial embroidery use before you stitch it onto products that generate revenue. With a bit of care in preparation, this machine embroidery design can become a quiet workhorse for your brand identity and a delightful detail that customers remember.